Scalp micropigmentation (SMP) is a revolutionary hair loss treatment that can help to restore the appearance of a full head of hair. It involves using tiny pigment deposits to replicate the look of natural hair follicles, giving the appearance of a full and thick head of hair.
The Step-By-Step Procedure of Scalp Micropigmentation Los Angeles
This section explains the process in detail, from the initial consultation to the aftercare instructions.
1. Consultation
The process begins with a consultation in which the patient discusses the desired results with a specialist. During this consultation, the patient's skin type and hair color are evaluated, and the technician will also make sure to understand the patient's expectations.
2. Shaving
Before the actual scalp micropigmentation Los Angeles treatment begins, the technician may recommend that you shave your head. This allows for better access to the scalp so that the pigment can be evenly applied. It also allows for greater accuracy when drawing the pattern of your micropigmentation treatment onto your scalp.
3. Drawing Pattern
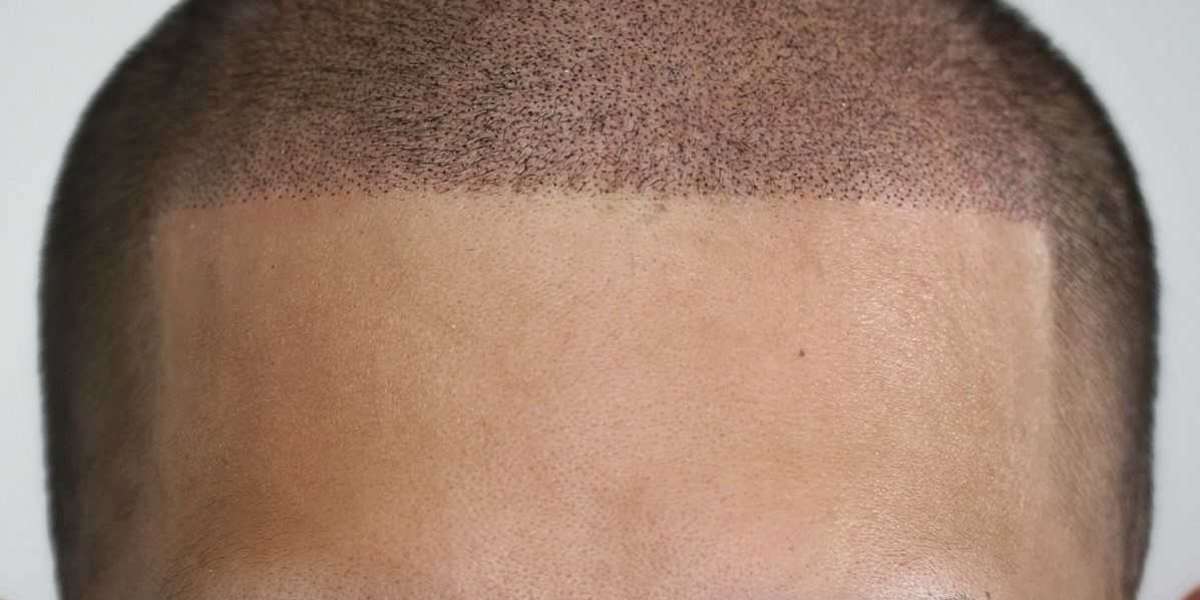
After shaving your scalp, the technician will draw out the pattern of your scalp micropigmentation onto your scalp using a marker. This pattern is designed to closely resemble natural follicles to look as natural as possible when completed.
4. Applying Pigment
Once the pattern is drawn onto your scalp, the technician will apply the pigment using a specialized applicator. This applicator creates tiny dots of pigment on your scalp that mimic natural hair follicles. This is done carefully and skillfully to ensure that each dot of pigment is uniform and accurate.
5. Blending and Coloring
After applying the pigment, the technician will use a brush to blend it into the surrounding tissue and give it a realistic appearance. Additional pigments may be added or removed to achieve the desired result. They may also mix different shades of pigments to achieve the correct tone for your scalp micropigmentation.
6. Finishing Touches
Finally, any excess pigment is removed from the scalp before the technician applies a healing balm or protective layer over your treated area. This helps protect the freshly applied pigment and ensures it lasts many years.
7. Post-Treatment Care: Aftercare
Once you have undergone scalp micropigmentation, there are several aftercare measures you should take to ensure that the treatment is successful. The first step is to avoid direct contact with the scalp for at least 24 hours after the procedure. Limit physical activities like sports and exercise and prolonged sun and heat exposure for at least five days following the process. This will help to ensure that your scalp micropigmentation stays intact for a longer period.
Conclusion
It's important to follow up with your practitioner after the procedure. Your practitioner may recommend an additional touch-up session or other treatments to ensure the best possible results. Following these aftercare instructions ensures that your scalp micropigmentation looks its best for as long as possible. If you're considering scalp micropigmentation los angeles, it's important to understand the entire procedure to make an informed decision.